
Cause: DNS record not found or incorrect.
Solution: Verify the CNAME host and target match exactly. Check for typos and trailing dots as required by your provider.
Hosting your help center on your own domain builds trust with customers, improves SEO, and maintains brand consistency. Subdomains like help.yourcompany.com are the recommended approach.
Before you begin: You'll need admin access to both Ferndesk and your DNS provider (GoDaddy, Namecheap, Cloudflare, Route 53, etc.).
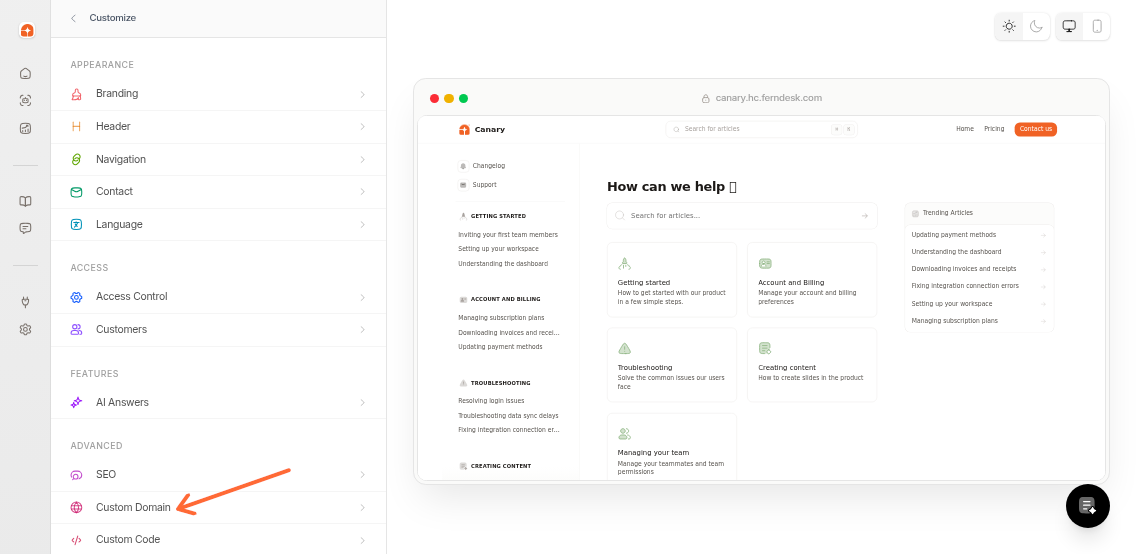
Go to Help Center → Customize → Custom domain.
Enter your subdomain (e.g., help.yourcompany.com) in the input field.
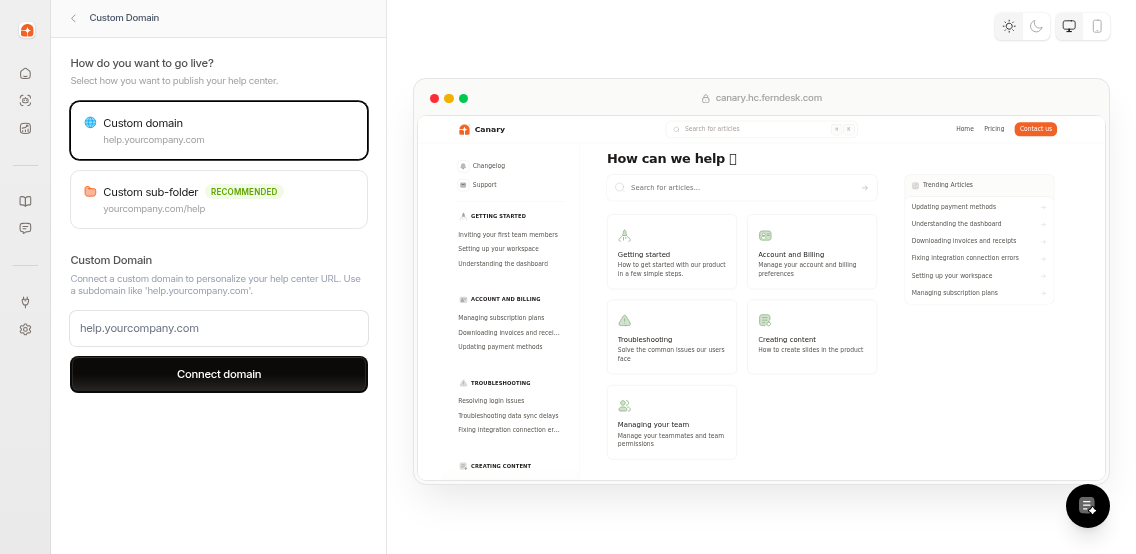
Click Connect domain. The status will show as "pending" with DNS configuration details.
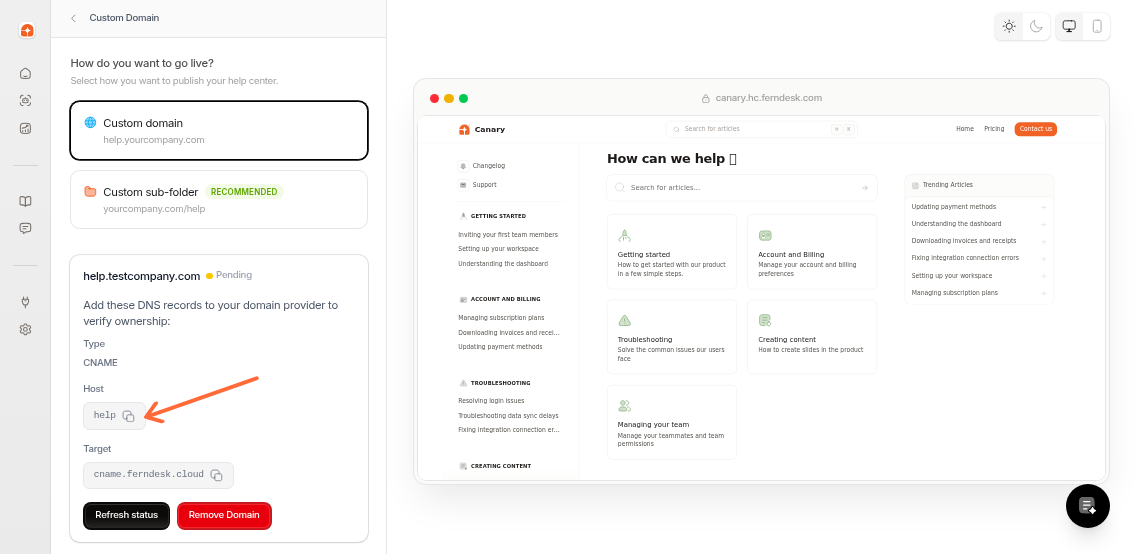
In your DNS provider's dashboard, create a CNAME record with these values:
Type | Value |
|---|---|
CNAME | Host: |
Target: |
Use the copy buttons in Ferndesk to avoid typos. Some DNS providers require a trailing dot on the target (e.g., cname.ferndesk.cloud.).
DNS propagation takes 24–48 hours. Your domain remains in "pending" status until Ferndesk detects the record.
Return to Help Center → Customize → Custom domain and click Refresh status.
Once DNS propagates, the status changes to "active" and your help center is live at your custom domain.
If your domain uses Cloudflare nameservers, Ferndesk can automatically configure your DNS records for you.
Follow the steps above to add your domain in Ferndesk. After clicking Connect domain, Ferndesk detects whether your domain is on Cloudflare nameservers.
If Cloudflare is detected, you'll see a card labeled One-click DNS Setup with the message "Ferndesk automatically configures your DNS records." Click Connect to open Cloudflare's authorization page.
The guided option only appears when Cloudflare nameservers are detected. If you don't see it, your domain isn't using Cloudflare nameservers. Use the manual DNS setup instead.
In Cloudflare, approve the request to let Ferndesk configure your DNS records. This adds the required CNAME record automatically.
After approving, return to Ferndesk and click Refresh status. The status will update to show whether your domain is active or still pending DNS propagation.
If the status shows "pending," wait a few minutes and refresh again. DNS propagation can still take a short time even with the Cloudflare setup.
Cause: DNS record not found or incorrect.
Solution: Verify the CNAME host and target match exactly. Check for typos and trailing dots as required by your provider.
Cause: Domain still registered with previous platform.
Solution: Remove or rename the custom domain in your previous help center platform (Intercom, Zendesk, etc.) before adding it to Ferndesk. Both platforms may use shared infrastructure that prioritizes the older registration.
Cause: Another Ferndesk workspace uses this domain.
Solution: Choose a different subdomain or contact support if this is an error.
Cause: Root domain entered (e.g., example.com).
Solution: Use a subdomain like help.example.com.
Cause: Domain format is incorrect.
Solution: Check for typos. Domains must include a dot and follow standard DNS naming rules.
Cause: Restrictive CAA (Certificate Authority Authorization) records in your DNS.
Solution: CAA records control which certificate authorities can issue SSL certificates for your domain. If your DNS has a CAA record that only allows a specific certificate authority, Ferndesk may be unable to provision your SSL certificate even when the CNAME is correctly configured.
Check your DNS settings for any CAA records. Either add Ferndesk's certificate authority to the allowed list, or remove the restrictive CAA record if you don't need it. After updating, click Refresh status in Ferndesk to retry certificate provisioning.
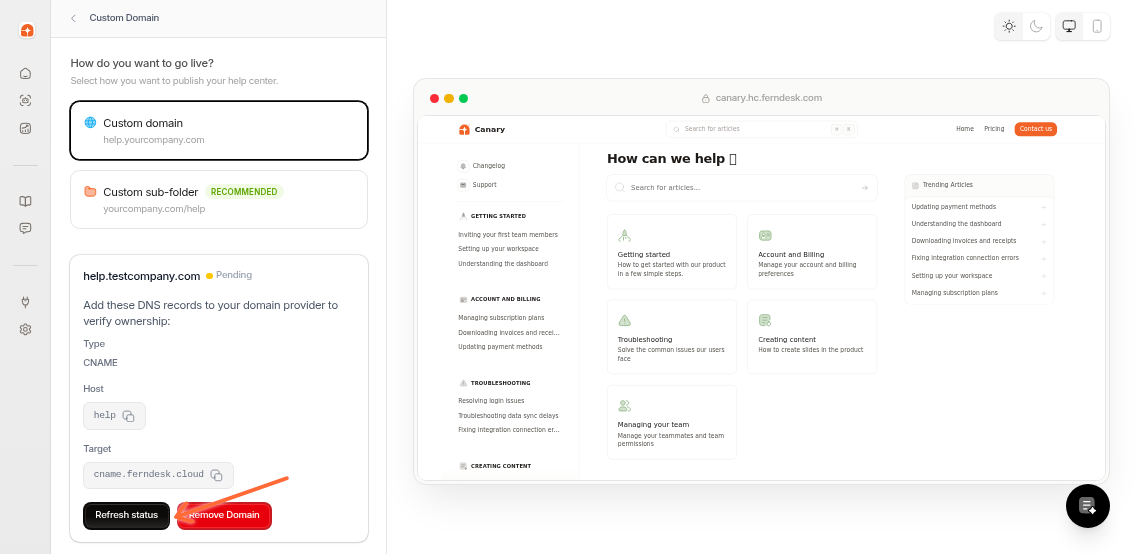
To revert to the default Ferndesk URL, go to Help Center → Customize → Custom domain and click Remove Domain. Update any shared links or bookmarks after removing.
Note: Ferndesk automatically provisions SSL certificates and only supports CNAME records. Root domains are not supported.
Once your custom domain is active, customize your branding and configure SEO settings to maximize search visibility.