
Older workspaces, and ones that chose only a help center at sign-up, start without Support. An owner or admin can turn it on: open Inbox under Support in the sidebar and choose Turn on Support.
Set up Support
Support gives your team a shared inbox where your AI agent answers each conversation first. If you picked a support inbox or an AI agent at sign-up, your workspace starts with Support on and a Ferndesk email address that customers can write to. Setting it up comes down to three things: connecting your inbox and channels, deciding what your AI agent may answer, and inviting the people who take the rest.
Needs a paid plan or an active trial. Owners and admins can change Support settings.
Connect your inbox and channels
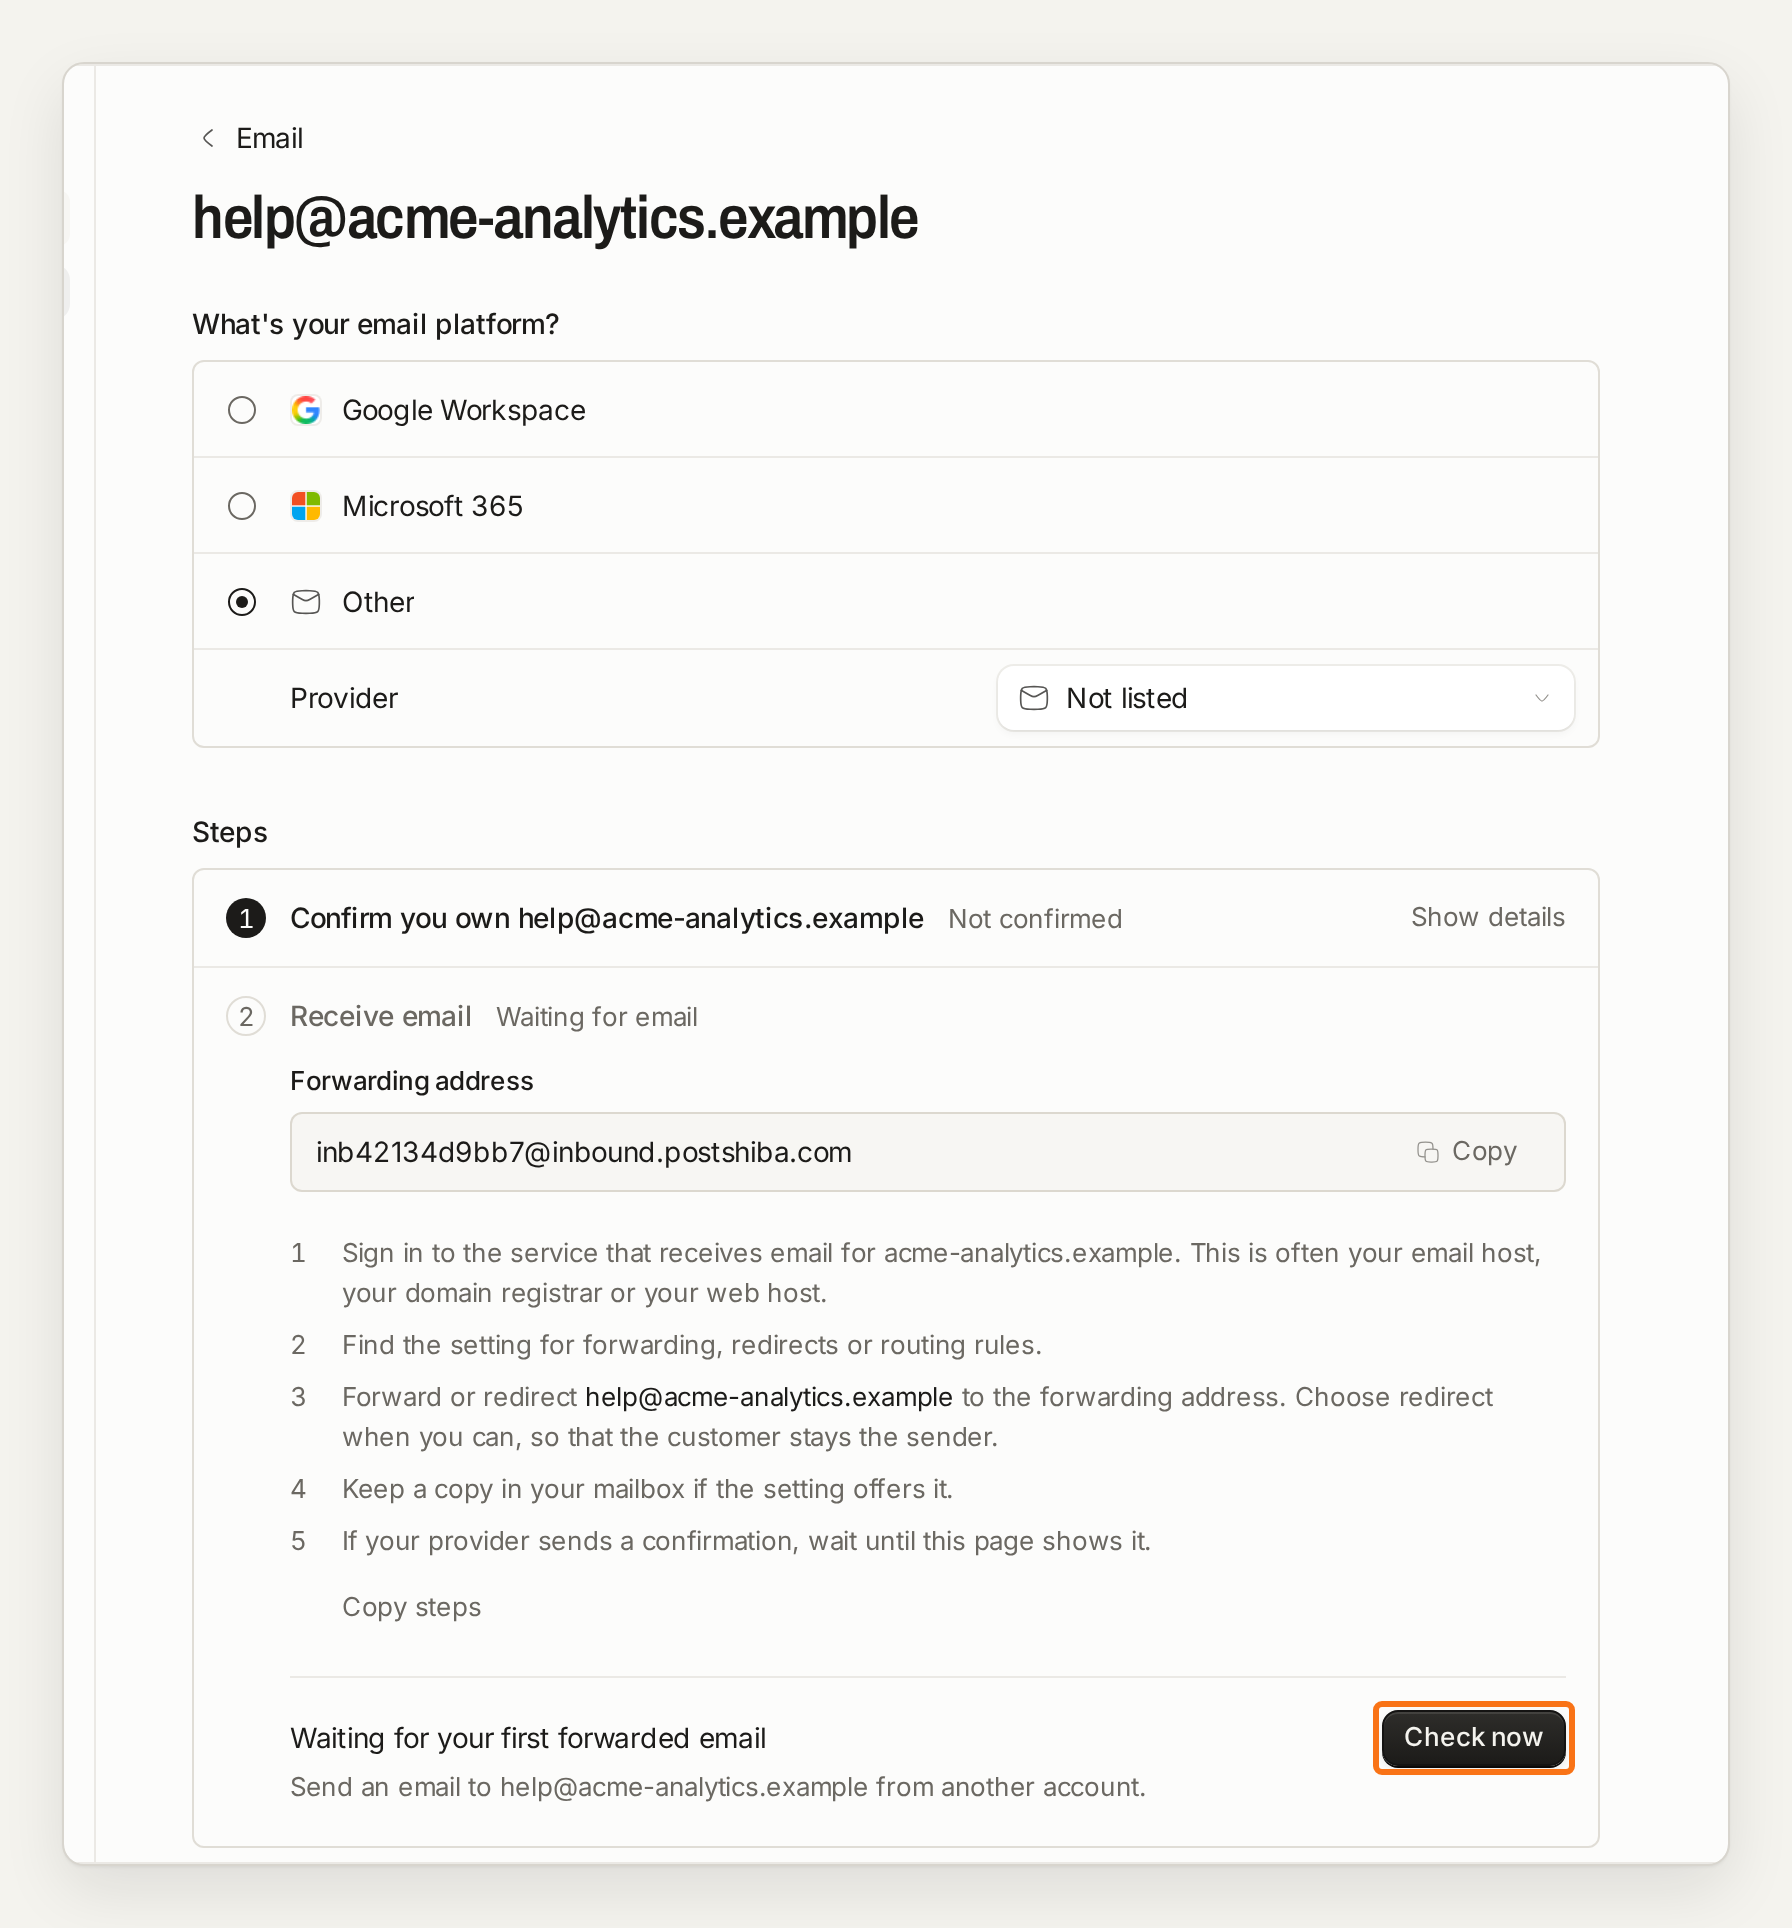
To receive mail sent to your own address, such as [email protected], add it in Settings > Channels > Email and forward it to the Ferndesk address shown there. Forwarding also confirms that you own the address. Send a test email from another account to check that it arrives.
Chat comes in through the widget. Once the widget is on your site, visitors can start a conversation from its Messages tab, and it lands in the same inbox. See Connect email and live chat.
Decide what your AI agent answers
Your AI agent answers from your published help center, so the better your articles, the more it can handle. Give it a name and tone, and set when it hands a conversation to your team. See Set up your AI agent.
Invite your team
Invite the people who will answer conversations. Contributors can reply and add notes; owners and admins can also assign conversations and change settings. See Invite your team.
Past conversations and saved replies from your current tool are imported during sign-up; see Switch from another tool.
I don't see the inbox
Next: Work in the inbox.
Was this helpful?
Was this helpful?